Showing posts with label Workshop. Show all posts

Monday, April 14, 2014

Roubo Finale!

The finished product!  The last two posts detailed the base construction and the top lamination.  In my excitement to get the final assembly done, I took very few photos.  So I cleaned up the shop today and got some beauty shots and I will also try to go over each of the features of the bench.

First, the point of this workbench.  I have really gotten into hand tool woodworking and have had trouble ever since I started with properly holding the boards down. I have my assembly table, but it was built on wheels to be mobile, not very good for hand planing a board, it just moves all over the place. The moment I started hand tool woodworking, I wanted a big, heavy, immovable workbench. Here it is!


Sunday, April 13, 2014

Roubo Workbench - II

The top of this workbench needs to be big, bulky, tough and most importantly, heavy.  With the Base complete, It was time to laminate the top sections.  Since this will be a ‘Split-Top’ bench, there will be 2 sections for the top with a gap for a tool holder in the middle. One section I can glue up to full width right away, but the other section gets some special treatment due to the vise that will be inset into it.

The first thing to do is to prepare the lumber to be cut to size.  Since I buy rough cut lumber, the edges are neither clean nor straight, and before I can put the boards through the table saw to cut them to width.  When you have a rough edge, there is a high chance that it will become bound in the table saw and be very dangerous.

So to clean up an edge, I turned to my hand-planes.


I used this method on both the rough cut skinny boards as well as the wider boards that I sized on the band saw.  The edge of the board was still quite rough after  the band saw so there wasn't much difference between the 2.

If I was able to keep them thick enough I would need 12 boards, roughly 4.5” wide and 8 feet long. So when I planed the boards down, I kept as much thickness as possible without trying to make them even or similar.


Sunday, March 30, 2014

Roubo Workbench - Part I

There is always a long, and ever-growing, list of projects to get on with in the shop, and sometimes the hardest thing to do is decide what is next.  I have wanted a new workbench for some time now.  While I have been in the process of honing my skills with hand tools, I have discovered that my work holding options are far too limited and quite unstable.  Back before the cabinets, and tool chests and other projects, I bought the Benchcrafted Split-Top Roubo workbench kit.

It comes with a tail vise, a leg vise (front vise) and the hardware needed to install them into a French style woodworking bench.  They also came with a set of large scale drawings.


Once the cabinets were out of the shop, it was time to start!

The first choice that I had to make was the type of wood to make the bench out of.  You want something strong, that will last for generations, but you also want it to be stable, easy to work with and not too expensive.  I narrowed my choices down to 3 materials

Soft Maple- Almost the default material for large benches.  It is very strong as well as being in the middle of the hardness range.  This is good because when making hardwood projects, any dings or dents will happen to the bench and not the workpiece.  It is also a very attractive wood with a closed grain.

Ash- Another good choice, and more cost effective than maple.  It has a strong grain, almost like that of oak, but it has similar properties in strength and hardness to maple.

Southern Yellow Pine- Very cost effective choice, but difficult to find in the grade of lumber that I was looking for.  Any Home Depot or Lowes in Houston have SYP 2 x 12” boards, but they tend to be full of knots or warped beyond recognition. While quite soft, it is very strong, which is why they build houses out of it.

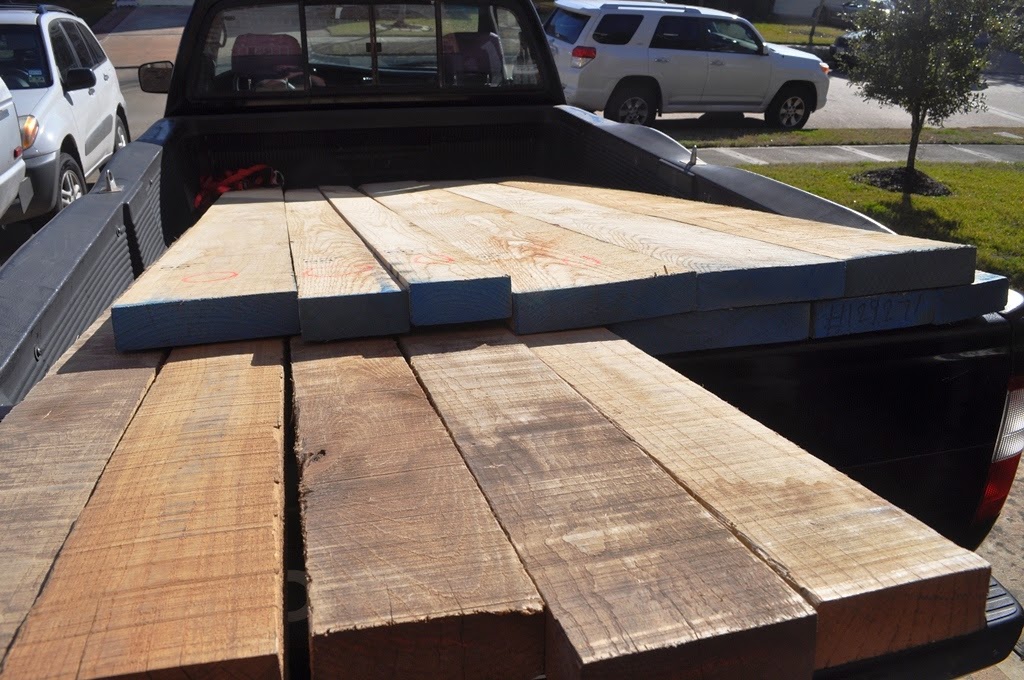
If I had been able to find appropriate SYP, and I tried, I would have used that.  But eventually, I gave up looking for clear boards and went and loaded up on Ash.  About 150 board feet of it!


Tuesday, March 11, 2014

Workshop Tour

There is a long, and ever-growing, list of projects to start, complete and finish when you start woodworking.  I currently have written 2 blog posts about a dining room table that I haven’t touched in 2 months.  Currently I am working on my new workbench (more on that to come in a blog post later in the week) but I recently completed the 13 foot counter top and took the opportunity to clean the shop.

Very early on, I had a request to give you all a tour of my current set-up… so here we go!

I currently live in the middle of the suburban sprawl that is Northwest Houston.  We rent our house, so the modifications that I make to my set-up have to be superficial at best.  We have a 2 car garage, which has held not 1 vehicle since moving into the house, and it is my shop.


I also currently share the garage with 2 refrigerators (half of our current supply) and ongoing projects.
The main tool that takes up a lot of floor space is the table saw.  It is a 10” Delta contractors saw that I bought off craigslist about 2 years ago.  The guy was selling an entire shop worth of small delta tools, and I bought everything I could afford off of him.  It was a 6” Bench top jointer, a Planer (that I have replaced) and the saw.  I have added an outfeed table to the back with some adjustable feet, and I have an assembly table that can handle outfeed duties as well when working with long or unruly stock.


Underneath the table I hide my minimal dust collection.  I have a Ridgid shop vac connected to a cyclone dust separator.  Neither is really adequate for the amount of dust I produce, but my tools are currently not in a great state for dust collection anyway.  It serves its purpose for the time being, and that is to be adaptable.


On the East wall of the garage I have multiple items:

Stock storage, both solid lumber and sheet goods


Band Saw (due to it being the only 20A Circuit)

And my grandfather’s drill press

Also, a set of cabinets that were originally for my beer room… that have become storage for my air compressor and miter saw


Above the cabinets there is a pegboard to hold some odds and ends, mostly drills, sawblades and straightedges.


The drawers of the cabinets hold some drill bits and safety gear.  There is also extra hardware from projects I have built and torn down and extra when buying in bulk.


On the west wall I have 2 tool boxes that I built that hold the majority of my tools. 1 is for power tools, they used to be out on a shelf, but once I got pneumatic tools, I was worried about dust getting into them.

 My most used: Routers, Jig saw, Nail Guns, and Biscuit Jointer

SANDERS!

Saws, Circular and reciprocating

And the other is for everything else.  I had a small set of tools, and there were tools contributed by my better half, but most of these tools were my grandfathers.  


There is a drawer for everything, for example, 1 drawer solely for hammers. 14 hammers. (What am I going to do… throw them out?)


This wall also has a pegboard, but it only holds clamps.  I also built a rack for my pipe clamps of varying heights.  I was mocked at first for the sheer size of my clamp collection… until they were needed then I looked like a GENIUS.


The Oak hanging cabinet was my original home for hand tools, and it still has some of the stragglers.  I will keep it filled with something, but for now, I don't know what.


Below the pipe clamps is the flip top tool cart with my sander and planer, a router table and a storage bin with sand paper, tool manuals and some other things.


On the north wall I have the 2 fridges, one currently being hiding behind my Dutch tool Chest (LINK)


Also on this wall are my finishing supplies.  Paint, finishes, stains etc.


At this time, the heart and soul of the shop is my assembly table.  It is where I do most of my work.  I clamp pieces to it to work on them… and it mostly holds them.  This is the next area to upgrade.


All said and done, it is a nice shop.  I really enjoy building things, especially when I can do the work effectively with my own two hands and no power tools, and the shop allows me to have a place to do that.  There are some needed upgrades.  A new workbench is the highest and current priority, some organization for the power tool drawers, and better dust collection.  Some things will have to wait until I am no longer renting.

Sunday, February 16, 2014

Dutch Tool Chest


In early November of last year, I had the opportunity to attend a hand tool woodworking class in San Marcos, TX that was taught by Chris Schwarz.  Chris is one of the most visible members of the hand tool community.  He has written many books, most notably “The Anarchist’s Tool Chest” and travels around the country, and world, teaching woodworking classes.

I was able to attend this class with my friend Josh, who has been recently updating his blog at boundariesintime.  It was a great weekend of woodworking and beer consuming and it definitely made me more confident in my ability to work with hand tools.

Unfortunately, again, I don’t have too many pictures of the process. So for now, I will do my best to describe the build…

This chest has 2 compartments, an upper and a lower, which will house my hand tools.  The most used tools will be up top with the lesser used tools below.  I also wanted to put a drawer in the bottom compartment to hold some of the smaller things that are easy to lose. It also has a sloped lid that was historically for shedding water when it rained, but it also serves the purpose of not allowing me to put things on top of it.  It is very easy to fill every flat surface in the shop with tools that I just used or scraps of walnut that “might be useful for something”.  This stops the clutter from getting in the way of the tools.

Keep in mind; all of these steps were completed without the assistance of power tools!  The shop that we were in was the Wortheffort woodworking school.  There were a dozen benches, moxon vises, and plenty of extra tools for those who didn’t have them.


We started by cutting the bottom and sides to size.  There was material provided for the course, and since the chest would be painted, I made mine out of poplar. 


Once the pieces were cut to size and cleaned up, we started laying out for dovetails.  The bottom will be holding a nice amount weight, so the dovetails are critical to support that.


In this case, Chris had asked that when a certain problem arose, to tell him so he could demonstrate fixing it.  My friend and I were a bit further along in our woodworking skills and as such, I was the 2nd one done with the tails.  That also meant that I was the first one with the problem… so the teacher had to come help!


Once the dovetails were complete, we cut the dado for the shelf.  This was cut by hand and without the use of a guide block.  I wanted to challenge myself a little bit, and I am happy to report that I didn't mess up too bad!  You can see both Josh and my chests in the glue up stage.

Only one clamp needed!

The next stage was adding the front and the back.  The back is ship lapped to allow for expansion and contraction while the front is simply screwed on.  I still contest that the hardest part about building this using only hand tools was screwing in all of the screws.  I definitely take my power drill for granted.
This was where we got to during the class, a fully formed chest, but no lid attached and nothing inside.  Over the course of the next few months, in between frantic toy-chest building and Christmas gift making, I was able to chip away at the tool chest.  The first point of business was adding a drawer.  We deviated from the plans a few inches to allow room for a drawer in the bottom compartment.  I have a lot of scrap walnut around, so I used an interesting piece with a lot of sapwood for mine.


It is hung from 2 ‘L’ brackets inside the compartment that ride in grooved on the inside of the drawer sides.


The front is handcut half-blind dovetailed into the sides.


And the front is decorated a little bit with a bead that was made using a straight slot screw in a piece of wood!


With the drawer done, it was time to outfit the inside.  I had a general idea of what would go into the upper compartment, so I laid them out and installed some dividers to keep everything from sliding around.


In that last picture you can also see the chisel storage rail.

The next thing to make was the saw storage.  I have seen saws stored under the lids, and I wanted to maximize the space inside by doing the same.  In theory it seems easy, but in reality, it is a little difficult.


I hand drilled a few holes and then, very carefully, cut the long straight cuts with a coping saw.  They aren’t perfect, but the saws fit in nicely and don’t move around when opening and closing the lid.


I had a friend of mine make some leather straps to hold the lid open, I really like the color that he chose and they work great.  I don’t know if they will stay the same length in the heat of a Houston summer, but they look too good, I will cross that bridge when I come to it.

The chest features a simple yet effective locking mechanism for the front. There is a bracket on the front that allows a narrow strip of wood to pass through.  There are matching relief cuts in the bottom of the chest and in the shelf to capture the slat.  Once the lock is fully pressed down, the front won’t come off.  This was originally done so that workers in a shop would only need to lock the top and both compartments would remain protected.


The last, and most fun, thing to do is to fill it with tools!


From my count, I am able to fit:
7 saws
8 hand planes
15 chisels
4 card scrapers
2 squares
2 drills
1 mallet
And various marking and layout tools (rules, scribes, marking gauges) along with extra blades for most tools.

I think I have room to spare in the lower compartment. I guess I will need to buy more tools.

I really enjoyed making this tool chest.  It was challenging and eye opening at the same time.  I realized I can do a lot of tasks with hand tools that I didn't think I had the skill to do.  It also taught me to slow down and think before making a cut, as some things can’t be rushed. Some more beauty shots:

 Hand cut edge profile on the lid.  This was nerve wracking to do on a finished lid.
The Ship Lapped back panels.


I think the thing I like the most about the chest and hand tools in general, is that it was my grandfather’s tools that really got me started.  I am so happy that they have a home and get used regularly now!