
The top of this workbench needs to be big, bulky, tough and
most importantly, heavy. With the Base
complete, It was time to laminate the top sections. Since this will be a ‘Split-Top’ bench, there
will be 2 sections for the top with a gap for a tool holder in the middle. One section
I can glue up to full width right away, but the other section gets some special
treatment due to the vise that will be inset into it.
The first thing to do is to prepare the lumber to be cut to size. Since I buy rough cut lumber, the edges are
neither clean nor straight, and before I can put the boards through the table saw
to cut them to width. When you have a
rough edge, there is a high chance that it will become bound in the table saw
and be very dangerous.
So to clean up an edge, I turned to my hand-planes.


I used this method on both the rough cut skinny boards as
well as the wider boards that I sized on the band saw. The edge of the board was still quite rough
after the band saw so there wasn't much
difference between the 2.
If I was able to keep them thick enough I would need 12
boards, roughly 4.5” wide and 8 feet long. So when I planed the boards down, I kept
as much thickness as possible without trying to make them even or similar.


At last, it was time to glue. I started with the front section, that would
eventually get the vise, so that when the other was drying I could start
working on it. So I got 4 boards ready,
and applied a healthy amount of glue, and an even healthier amount of clamps.


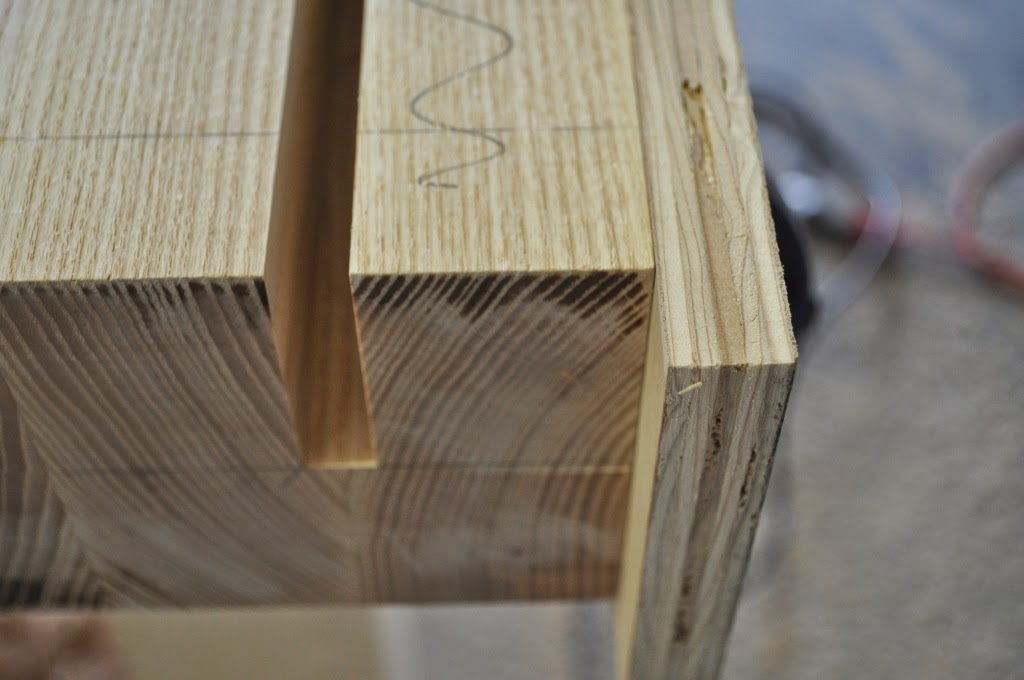
Once it was dry, it was time to do some routing. First was to remove the material where the vise
would go. I didn't really take pictures of the entire process, but from the pictures below, I continued to make similar passes, going to the right until there was a 2" by 2 7/8" channel in the underside of the top.


Once that was complete (it made quite a sawdust pile) it was
time to cut the dog hole strip. I cut
the face off of one of the remaining boards and laid out for the dog holes. These hole will house small pieces of wood, called dogs, that I can place boards up against and pin boards between them and the vise to hold them down. The holes have an inset for the head of the dogs and are at a 2 degree angle to offset the flex of pushing hard against them.

This is the template that I used. I have a few flush trim bits that worked with the template, and since I have 2 routers, I used them both.

This larger bit was used for the main material removal. It has a 1/2" shaft that can handle more stress and is wide to remove a lot of wood at once.

This smaller guy was borrowed from my buddy, Josh, and has a small radius, capable of getting into the corner at the base of the head.

I stared with 1 pass with the larger bit, to get a good chunk of the material out of the way.


I then came back at a lower depth in the same(ish) groove to get close to the bottom.

Still with the large bit, I trimmed around the template, and then I swapped routers and came with the smaller bit to really finish it off an get it to the full depth.


The finished product.


Fourteen in total.
Once they were complete, I glued on the strip that I had
just cut off. It did feel like I was working backwards a bit.


As I was doing all this, the rear section had been drying,
and it was time to cut it to rough length. Rather than setting up my circular
saw for 2 different cuts, which I would have to do again anyway when I mounted
the tops on the base, I went with the handsaw workout.

Making good use of my sawbench and new saw horses.


And, once again, without fail, I have run out of pictures.
One of these times I will be able to complete a project and I will have a
picture of each step along the way… this is not it. So, with that, next week, The Finished Workbench!
No comments:
Post a Comment