Tuesday, January 28, 2014

Shop Project- Flip Top Tool Cart

Sometimes it seems like Another Day, Another tool!  I had the opportunity to cash in some reward points and buy a Dewalt 735x at a greatly reduced price on Amazon.  I also had the opportunity to sell my previous planer that I had grown out of to a fellow woodworker.  It served me well, but I have higher expectations now.  When I originally bought it, I didn’t know what my hobby would grow into, and now it is time for a change.

The Old


The New
There are many upgrades between the 2 machines, but the most important, to me, are the improved surface finish on the planed boards, finer control over the height adjustment and much improved dust and wood chip extraction.

The Dewalt is a LOT heavier than the previous one. It was no chore at all to set it aside and pull it out when needed on top of my bench.  The Dewalt is nearly 100lbs and a bit awkward to lift above waist height.  I didn’t feel I wanted to throw my back out, so I decided to make a cart for it.  I had carts for some tools in the past, but I felt like the took up too much precious floorspace in the shop… until I saw my friend’s flip top cart. In the space of 1 tool, you can hold 2. I was sold. Now for the build.

The sides are made from 2 pieces of plywood glued together for strength. I wanted the metal rod, that acts as the pivot for the top, to have as much support as possible, and I didn’t feel I would get that with a 3/4 panel and a 3/8 inch deep hole.  All of the plywood that was used in this project was already in the shop.  Most being scraps from various cabinets and some free plywood from a crate at work.


What better to use as clamping weight!


To get the metal rod into the top of the cart, I had to cut a dado into 2 panels and then glue those together, leaving enough of the wood to have adequate strength.  The rod is a 3/4 inch steel rod from Lowes.


 Making sure the rod sits all the way down into the groove.

Once everything was dry, I drilled the holes, and started assembling


I also knew that I would want some nice locking casters on the bottom. I have used the cheaper ones on my tool chest, and I am not impressed with how they locked.  I sprung for the nicer ones, again at lowes.  I am happy with them so far, especially the ease in which they unlock.


The locking mechanism couldn’t be easier, just some gate slide locks.


Here is how the swivel works and looks.


And here are the tools.  The planer and the Oscillating spindle sander are mounted as I don’t think I will ever need to use both in succession on a project.


All in all I am pretty happy with the results.  It took me the 1 day to build, and that is with a break to watch the Broncos win the AFC Championship game.  There are some areas where a bit more thought would have tightened up some joints and made it a bit more stable, and I still want to add a drawer to hold all the things that fall out when a tool is inverted, but it is a functional piece. It flips. It holds my tools. Job done.

Tuesday, January 21, 2014

Art Room Cabinetry- Part IV

I think that finishing is the scariest part of a project. You work and work to get every joint perfectly fit, every surface smooth and then you finish it with too much gusto, not enough patience, or just completely the wrong product, and the piece is ruined.  This is why I lean towards the more expensive, but vastly more pretty, woods, just let the wood do the work of looking good for you.  The inherent color of the walnut on this project just needs a coat of oil and then, depending on the situation, a few layers of finish for protection.  No stains, no dyes, nothing to screw up!

Before I applied the finish, I had to completed the daunting task of sanding and leveling all the different boards and joints on this counter top. I was too worried about a few of the boards that had some large patches of open face grain to use a belt sander.  I thought I was going to put irreversible, perfectly straight (i.e unnatural) scratches into the surface.  They would have been very noticeable.  So I did all the sanding with a 6" Random Orbital sander and took baby steps through the initial grits to remove any sign of the previous.


I went from 60 grit for material removal and initial leveling, and up through 80, 100, 120, 150 a grain raising wipe of water and a final 5-6 passes with 220 to ensure that all the swirl marks and imperfections were out. The result is a silky smooth finish and (hopefully) no blemishes that will take away from the final product. The wood grain absorbs water at different rates and swells at different rates too, so a quick swipe with a damp rag will get the grain standing on end for a perfect sanded surface.

My finishing regimen for this piece will be a super easy coat of wipe-on oil and varnish mix for beauty and then a hefty amount of polyurethane for toughness and durability.

My mixture for the oil varnish mix is 1 part Boiled Linseed Oil, 1 part regular gloss polyurethane and 1.5 parts mineral spirits.  The mineral spirits are to make it easier to apply, I like simple, and wipe-on is as simple as it gets.


I use any old jar to store my finishes.  Pickles!

The best part of walnut is that very first time you wipe on the finish. It makes the hours and hours of sanding totally worth it.

Here is a shot of the raw surface and the with the finish being applied.


I keep the surface wetted and if the wood soaks it up, I keep applying.  Once it looks relatively uniform after letting stand for a few minutes, I wipe up the excess. I then come back in 15 minutes and wipe up what comes back out of the wood.


This is my favorite shot so far.


Look at all that figure...


I am going to let this cure for as long as I can stand, at least a few days, then it will be coat after coat of poly.

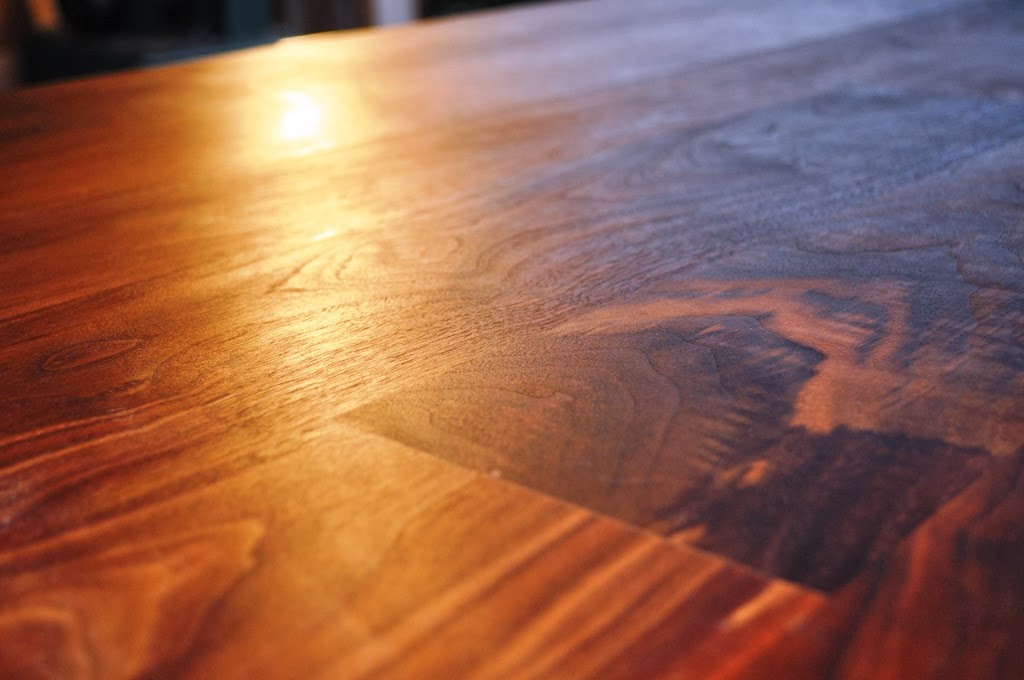
Gratuitous macro shot.

Saturday, January 18, 2014

Art Room Cabinetry- Part III

Now that I am all caught up on the Art Room Cabinetry project, unfortunately the progress will slow down to real life speed where I can work in the evenings and on the weekends.  A plus side to that is now that I regularly posting on this blog, I stop and think “this would make an interesting photo” and take it!

I am now working on the main section of the cabinet top.  The smaller section was about 85” x 10” this section is 148” x 20” in total.  They will be married together at a later stage to make a large and wide ‘T’
The first thing I did was to lay out the boards and get the tongue and grooves cut like I had done before.


The glue-up strategy was to work from the back to the front, progressively adding runs of boards.  In the picture you can see that I am gluing 3 strips together, this is actually just the addition of the #3 strip to the pre-glued #1 and #2.


I have #4 laid out to ensure that overhang on one side will be used to complete this run.
To ensure that I have the best alignment possible, I am using my biscuit jointer and some #20 biscuits.


The jointer cuts a slot a preset distance from the top face of each board


Then I add glue to the length of the edge, insert the biscuit, add more glue to that and clamp like crazy.


The next glue up was to add the #4 strip


The next step was to clamp everything between some purpose-built cauls.  These ensure that the overall top is as flat as possible.


It also allows me to stand the top upright so I can actually get in and out of the garage!


Once the glue was dry, it was time to survey the results.


There were some areas of slight misalignment.  This just means that I will have to work harder in later steps when I sand the entire top smooth. There also was 1 joint in which I had incorrectly tried to offset my error when cutting at 90° and ended up doubling my error.


I will have to add some walnut colored filler to this and other gaps as well as some knots.  I did a test run on the bottom of the boards to see if the wood filler will suffice. It ended up looking pretty good.


And in a little different light:


But the grain and the wood look amazing!  This is with a thin layer of Poly to see how the wood filler looks under the finish.  This is similar to, but not as deep and rich as, the planned final finished look.

Saturday, January 11, 2014

Art Room Cabinetry- Part II

The last piece of the puzzle is the top work surface, and it is what is giving me the most trouble. The customer wanted a solid wood top and loved the look of a few of the walnut samples that I showed them.  I purchased and milled the lumber to make a countertop that is 13’ in length and between 20-30” wide (the cabinets step out in the middle)

I have decided to tongue and groove the ends of the boards to create a countertop that is roughly 13’ long, and will just use biscuits and glue for the long joints for alignment.  It will be rather well supported over the whole length, so I am not too worried about strength.  Plus there is a lot of long grain glue surface to help with strength.

These are the boards for the middle step out span.  They will total 10” deep and will be attached to the main span later. You can see how I made the tongue and groove joint that was used for the end to end joints to provide strength. 


This was done with a Tongue and Groove set on my router.  It was nice to only have to set up once and do all the boards and since it was a matched set, the joint fit very tight the first try.  


Once I started gluing up, I realized that tight joints need clamps to stay tight and I had to loosen them a bit with a rabbeted hand plane to make the assembly easier.


It is called a rabbeting hand plane because the blade goes all the way to the edge of the body of the hand plane.  this allows me to get a cut on the wood all the way into the corner of the tongue to take a very small amount off the entire thickness of the board's width.


This is the final product, any remaining misalignment will be taken down when sanding... and there will be a lot of sanding... 

*don't mind the gaps and chips on the side, this will all be hidden when it is fully finished!*

Here you can see the final glue-up.  I used the pipe clamps where there was an overlap of boards to ensure that all 3 were tight to the others.  I took a lot of time to ensure that the edges of the boards were as straight as possible to help with the gluing steps.  If there was any deviation from perfectly straight it would not only induce gaps in the joint, but it would make the joints between other boards appear.


There is great grain pattern and figure in these boards.  I was never going to be able to fully match all of the boards without way overshooting on the cost of the materials, so I went with a nice blend of dark heartwood, lighter sapwood and some medium toned heartwood.  The overall effect will be very nice.


A few of the boards even have some very pretty and highly desirable ribbon figure that will pop when the boards are finished.

When it comes to gluing walnut, I try to make my life easy and use the dark wood glue from Titebond.  It is waterproof* (resistant), very strong and when it dries it is right about the color of walnut.


You can never have too many clamps.


I am in the middle of the glue-up for the larger 148" section of the top.  I will post again when it is close to complete.