
Now that I am all caught up on the Art Room Cabinetry
project, unfortunately the progress will slow down to real life speed where I can
work in the evenings and on the weekends.
A plus side to that is now that I regularly posting on this blog, I stop
and think “this would make an interesting photo” and take it!
I am now working on the main section of the cabinet
top. The smaller section was about 85” x
10” this section is 148” x 20” in total.
They will be married together at a later stage to make a large and wide ‘T’
The first thing I did was to lay out the boards and get the
tongue and grooves cut like I had done before.


The glue-up strategy was to work from the back to the front,
progressively adding runs of boards. In
the picture you can see that I am gluing 3 strips together, this is actually
just the addition of the #3 strip to the pre-glued #1 and #2.

I have #4 laid out to ensure that overhang on one side will
be used to complete this run.
To ensure that I have the best alignment possible, I am
using my biscuit jointer and some #20 biscuits.
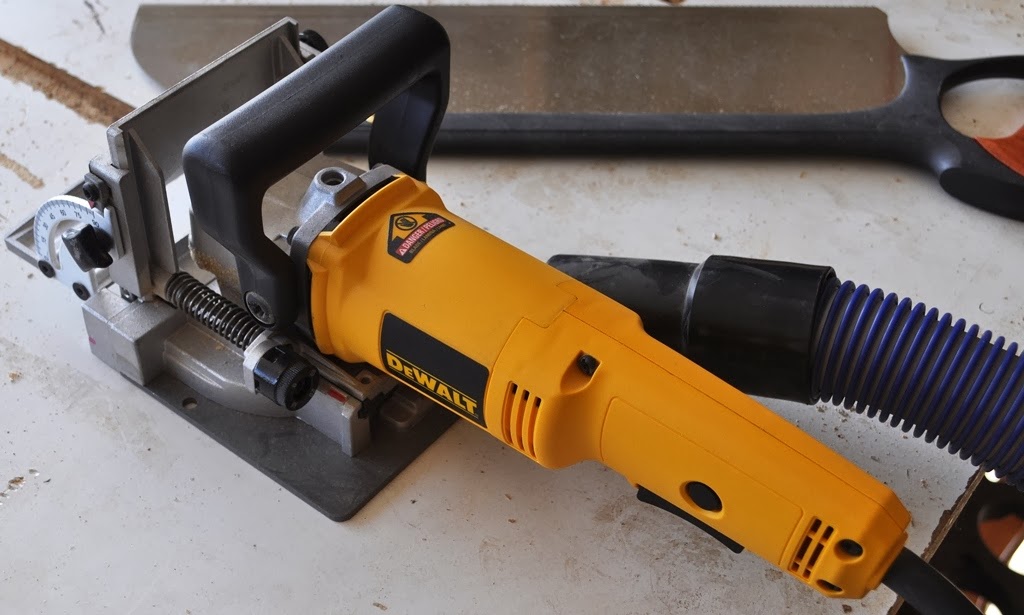
The jointer cuts a slot a preset distance from the top face
of each board


Then I add glue to the length of the edge, insert the biscuit, add more glue to that and clamp like crazy.


The next glue up was to add the #4 strip

The next step was to clamp everything between some purpose-built
cauls. These ensure that the overall top
is as flat as possible.


It also allows me to stand the top upright so I can actually get in and out of the garage!

Once the glue was dry, it was time to survey the results.


There were some areas of slight misalignment. This just means that I will have to work
harder in later steps when I sand the entire top smooth. There also was 1 joint in which I had incorrectly tried to
offset my error when cutting at 90° and ended up doubling my error.

I will have to add some walnut colored filler to this and
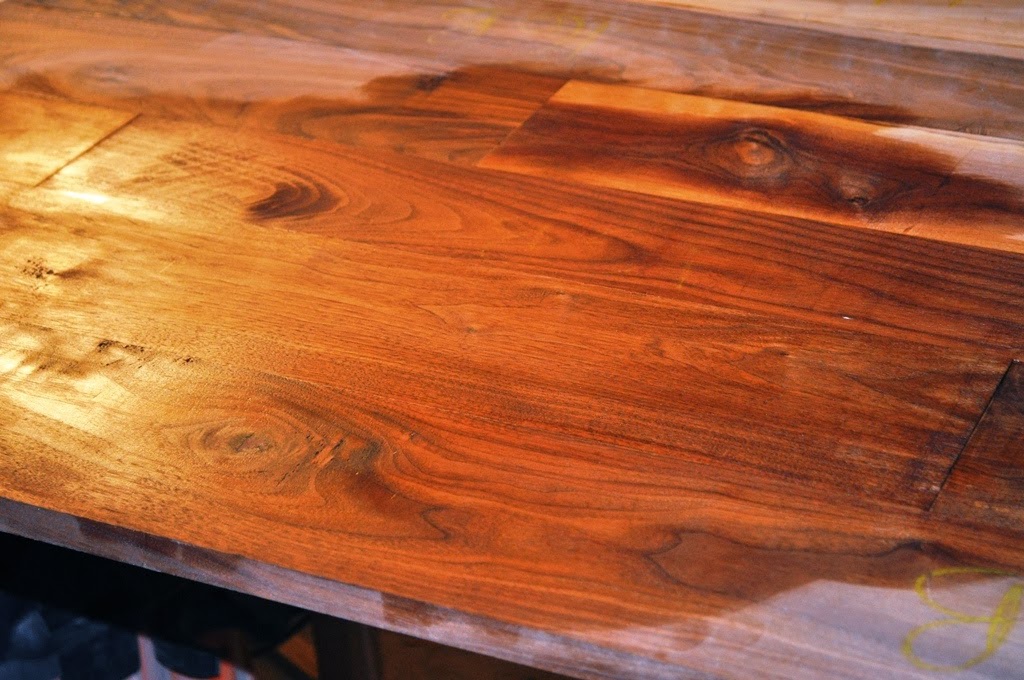
other gaps as well as some knots. I did a test run on the bottom of the boards to see if the
wood filler will suffice. It ended up looking pretty good.


But the grain and the wood look amazing! This is with a thin layer of Poly to see how the wood filler looks under the finish. This is similar to, but not as deep and rich as, the planned final finished look.
No comments:
Post a Comment